Occupant and technician safety
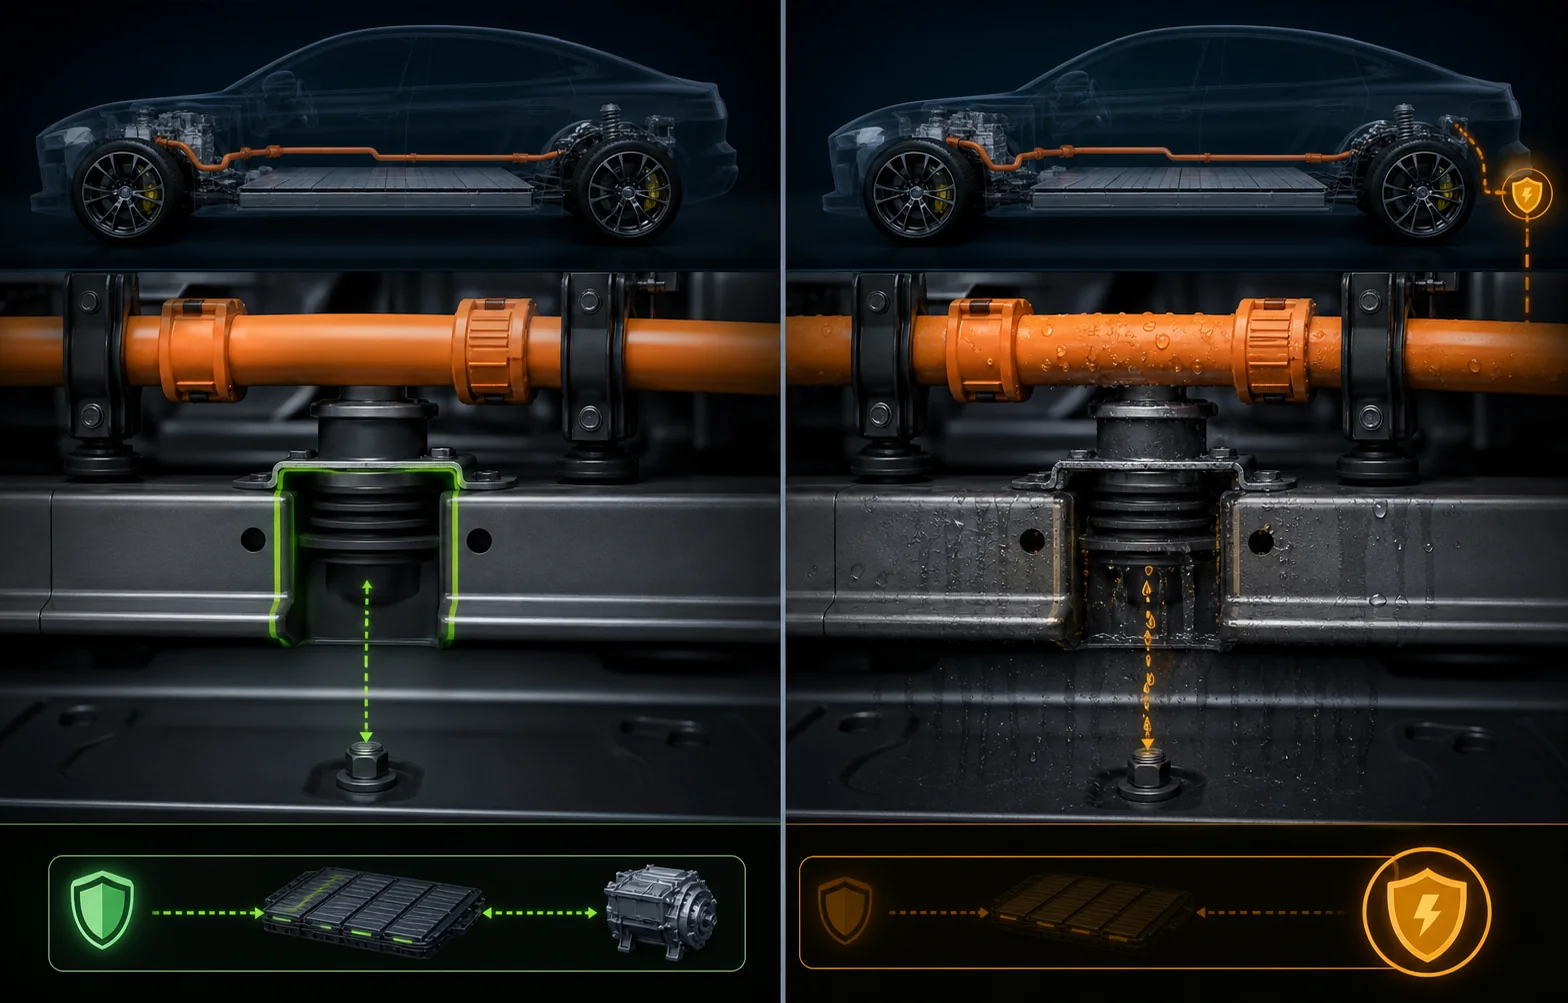
It helps detect when high voltage may be finding an unintended path toward exposed conductive parts.
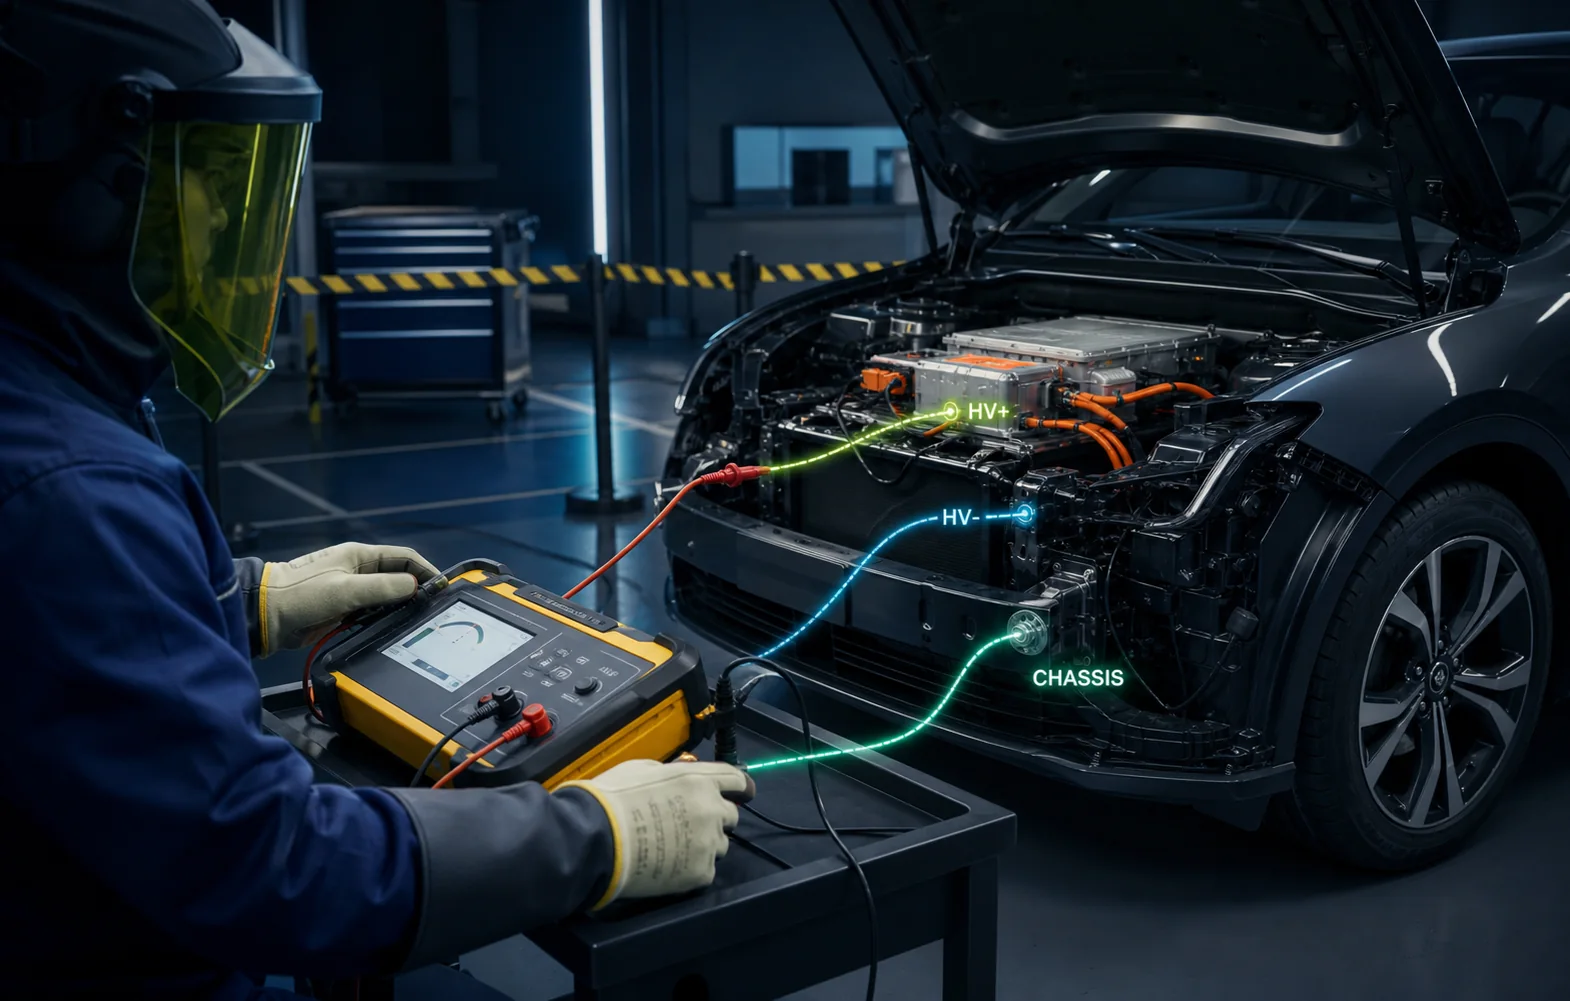
An EV insulation test checks how well the high-voltage system is electrically separated from the vehicle body. It is a safety test, a diagnostic clue and one of the most important checks after water ingress, impact damage or an isolation warning.
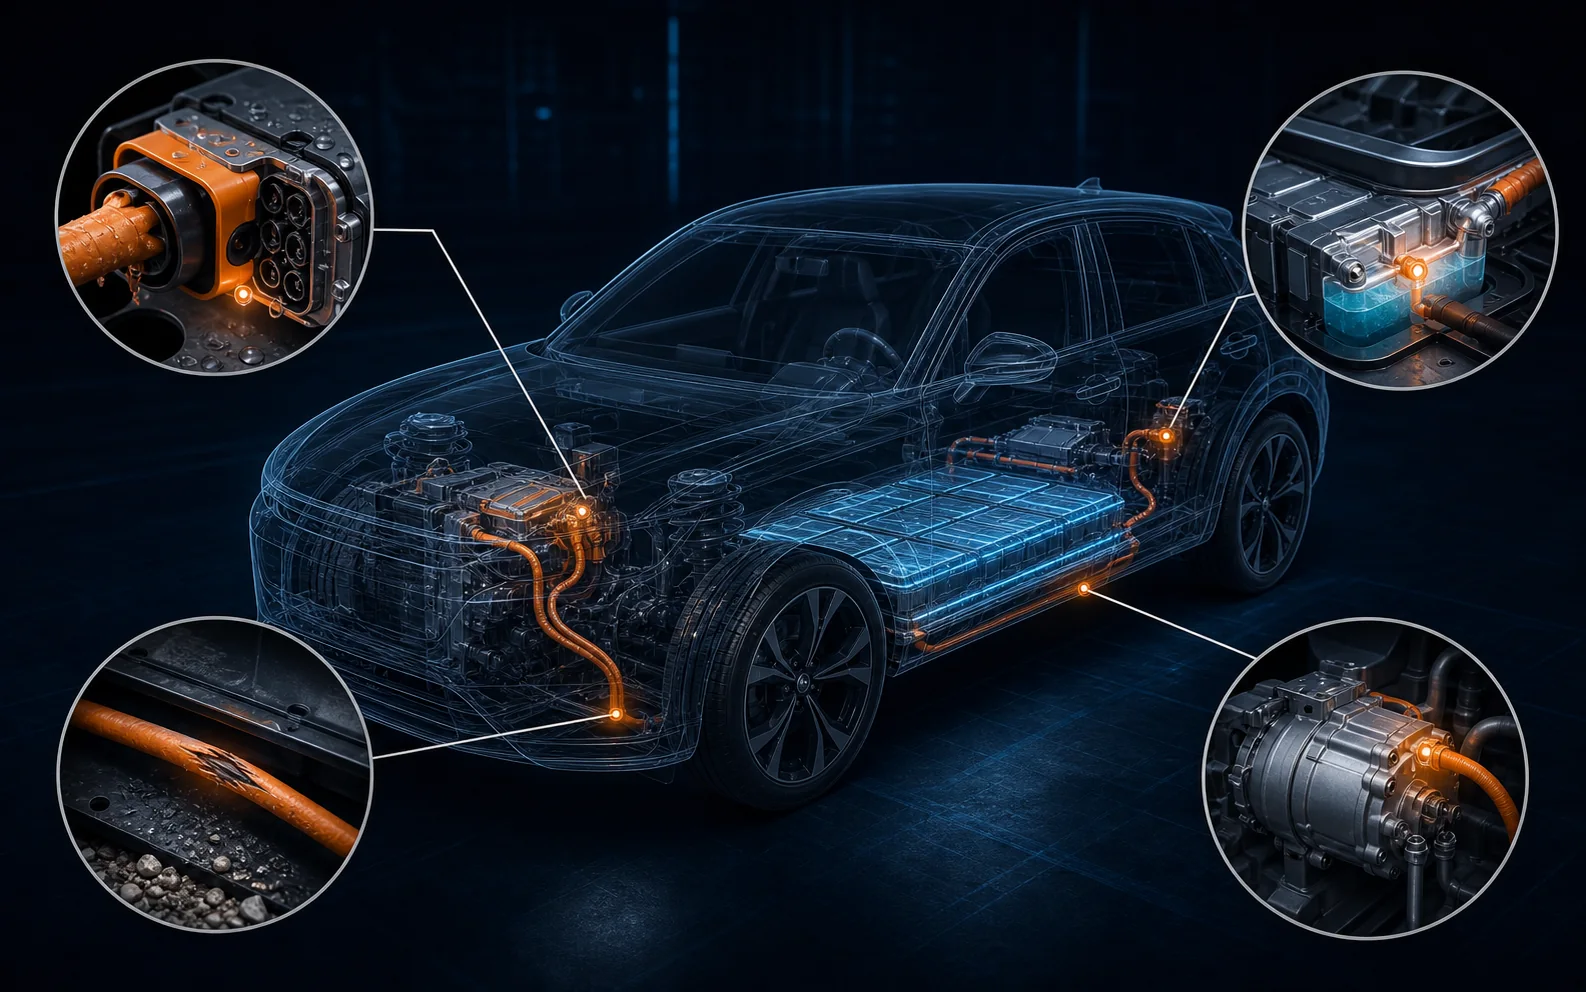
The high-voltage battery, orange cables, inverter, motor, onboard charger, electric heater and air-conditioning compressor are designed as an isolated electrical system. The metal vehicle body should not be part of that working circuit.
The vehicle continuously monitors isolation while it operates. If resistance falls too far, it may store an isolation fault, prevent charging, refuse to go ready or open the high-voltage contactors to protect occupants and technicians.
A measured value is not a parts verdict. The correct limit, test voltage, temperature conditions and connection points depend on the vehicle and the component, so the manufacturer procedure always takes priority.
These illustrations show the test principle and common fault areas. Exact access points and limits are always vehicle-specific.
 01
01
 02
02
 03
03
Insulation monitoring is designed to spot a loss of electrical separation before it becomes a greater safety or reliability problem.
It helps detect when high voltage may be finding an unintended path toward exposed conductive parts.
The car or charge point may stop a session when isolation is outside the permitted range.
The vehicle can keep its contactors open rather than energise a circuit it considers unsafe.
A fault after rain, flooding, coolant work or battery repair makes contamination history important.
Underbody strikes and collision damage can compromise cables, connectors or battery enclosure insulation.
Separating branches can distinguish a cable or auxiliary component fault from a complete battery-pack problem.
This is not a DIY test. High-voltage PPE, training, controlled access and the exact manufacturer procedure are essential.
Record the complete vehicle scan, isolation-monitor data, freeze frames, weather, charging state and when the warning appeared before disconnecting anything.
Secure the work area, identify the vehicle, shut down high voltage, remove the service disconnect where specified, wait the stated discharge time and prove the absence of voltage using the OEM method.
Look for impact marks, coolant, moisture, corrosion, damaged orange cables, disturbed connectors and previous repairs. Sensitive electronics must never be megger-tested while still connected unless the procedure explicitly permits it.
Use a suitable calibrated insulation resistance tester, the manufacturer-specified test voltage and the correct connections from the relevant HV conductor or subcircuit to chassis.
If resistance is low, isolate approved branches one at a time—such as heater, compressor, charger, motor or battery—to see where the reading recovers. Never disconnect live HV connectors.
After correcting the cause, restore every interlock and connector, repeat the specified insulation checks, clear faults only when appropriate, then confirm charging and ready operation.
| What the result shows | What it can mean |
|---|---|
| Stable high resistance | The tested circuit is well separated from chassis under those test conditions. It does not prove every intermittent moisture or vibration-related fault is gone. |
| Low on the positive side | Scan data or approved testing may suggest leakage is biased toward the HV positive side, helping narrow the search. |
| Low on the negative side | A negative-side bias is another localisation clue, not an automatic component diagnosis. |
| Changes with rain or temperature | Moisture, condensation, coolant, connector sealing or temperature-sensitive internal insulation may be involved. |
| Reading recovers when isolated | The removed branch becomes a strong suspect, but its cable, connector and connected component still need separating. |
No. An insulation fault is an unintended leakage path between the high-voltage circuit and chassis. It may have high enough resistance that no fuse blows, while still being outside the vehicle safety limit.
Not automatically. The fault may be in the battery, cable, inverter, motor, onboard charger, heater, compressor, connector or contamination. The system needs to be separated methodically.
Yes. Moisture or coolant can reduce insulation resistance, and the value can change as the vehicle dries, heats up or moves. History and environmental conditions matter.
If the vehicle reports a high-voltage isolation or electrical safety warning, stop repeated charging attempts and arrange specialist assessment. Follow any stop or recovery instruction shown by the vehicle.
Tell us the warning, when it occurs, whether charging still works and any recent water, impact or repair history. We can plan the correct safe diagnostic route.